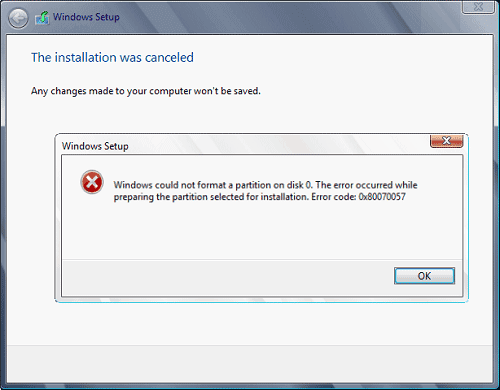
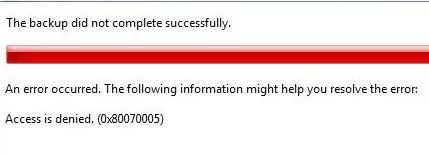
What is 'Windows Update error 0x80070057'?
Windows Update error 0x80070057 is an error that usually occurs when an update to Windows has gone wrong. This error could also appear when you are trying to backup files in Windows installation, and a hard drive failure.
How can you fix 'Windows Update error 0x80070057'?
Some of the solutions to this error include:
- Checking the hard disk drive (HDD) for defects
- Deleting SoftwareDistribution
- Reformatting the hard drive
- Editing the region settings
Please see our in-depth walk-through solutions below.
1. Check Hard disk drive (HDD)
Windows error 0x80070057 may appear when Windows is backing up, during Windows installation and when installing Windows Update. The cause could be a failing HDD. Check HDD if it has a bad sector. The problem with a primary hard disk that has a bad sector is when testing your may encounter a bluescreen of death or the PC may freeze. Therefore, if you want to test your primary hard disk, create a new Windows on a spare hard disk drive or external storage device such as a 36GB USB flash drive or use another PC and plug the suspected hard disk drive for testing.
https://youtu.be/BN4uwBDdcU8
2. Delete SoftwareDistribution and run DISM command with sfc /scannow command
Windows Update error code 0x80070057 may also be due to damaged or missing Windows Update files. Downloading the updates again and scanning for data errors may fix it.
Delete SoftwareDistribution
SoftwareDistribution is located in C:\Windows\SoftwareDistribution\download. Watch the full instruction below.
Run DISM command with sfc /scannow command
Watch the full instruction below. Copy the command below
sfc /scannow
DISM.exe /Online /Cleanup-image /Restorehealth
3. Reformat Hard drive
Windows error code 0x80070057 may also occur when installing Windows 10. It could be caused by the wrong hard disk drive format. Please delete all partition first below installing Windows 10.

-
Remove all storage device except the storage device that you would like to install Windows 10.
-
Boot to your Windows 10 installation CD/DVD or USB.
-
Select your Language, Time and Keyboard, and then press Next.
-
Press Install Now then enable "I accept the terms of the license," and then press Next.
-
Press Custom (Advanced).
-
Highlight each partition and press the Delete. Make sure there is no important file in that partition.
-
Press New, set size for your Windows and then press Apply.
-
Then press partition and then press Next.
-
Press Ok to proceed.
4. Edit Region settings
When backing up and Windows error code 0x80070057 occurs, the decimal symbol in the Region setting may not be set to "." in the decimal field. To verify, please follow the steps below. This is common in Windows 10 using a Non-English language version.

Option 1. Region setting
-
Open Control Panel, click Clock, Language, and Region, and then click Region.
-
Click the Formats tab, and then click Additional settings.
-
Type "." in the Decimal symbol field, and then click OK twice.
-
Restart the computer.
Option 2. Change from Registry
NOTE: By modifying the registry, Windows might not run properly.
- Click Windows Start, type in Regedit and then press ENTER.
- Browse for HKEY_LOCAL_MACHINE\SOFTWARE\Policies\Microsoft\System
- Click Edit, select New and then click DWORD Value.
- Type CopyFileBufferedSynchronousIo and then press ENTER.
- Right-click CopyFileBufferedSynchronousIo, and then click Modify.
- In the Value data box, type 1 and then click OK.
- Restart the computer.
