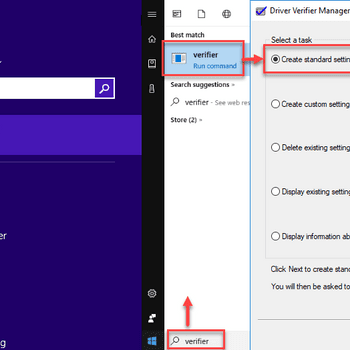
There are a number of common Device Manager error codes, including Code 10 (“This device cannot start”), Code 28 (“This device cannot find enough free resources”), and Code 39 (“Windows cannot load the device driver for this hardware”). These error codes typically indicate a problem with the device itself, or with the drivers that are installed for the device. In many cases, simply reinstalling the drivers for the device will resolve the issue. If the drivers cannot be found or are outdated, they can be downloaded from the manufacturer’s website.
![Delete all old driver versions]() Device ManagerWindows BSOD kernel_security_check_failure (Win 10, 8.1 & 7)Kernel_security_check_failure in Windows is an error that usually occurs due to Memory or Driver incompatibility issues or corruption of system data. Users upgrading their operating system to Windows 10 or 8.1 have reported seeing this error. It may also occur due to memory issues and virus infections.
Device ManagerWindows BSOD kernel_security_check_failure (Win 10, 8.1 & 7)Kernel_security_check_failure in Windows is an error that usually occurs due to Memory or Driver incompatibility issues or corruption of system data. Users upgrading their operating system to Windows 10 or 8.1 have reported seeing this error. It may also occur due to memory issues and virus infections.![Reinstall driver]() Device ManagerThis device cannot start error code 10Error 10 is one of several Device Manager error codes that usually occurs when Device Manager can't start the hardware device. This is usually due to corrupted or outdated drivers.
Device ManagerThis device cannot start error code 10Error 10 is one of several Device Manager error codes that usually occurs when Device Manager can't start the hardware device. This is usually due to corrupted or outdated drivers.
1. Update the driver
- Open Device Manager by clicking the Start button, clicking Control Panel, and then clicking Device Manager.
- On the View Devices by Type tab, click the Device Manager category that corresponds to the device you want to update.
- On the View Devices by Status tab, click the device that you want to update.
- On the Properties tab, click the Driver tab.
- On the Driver Details tab, click the Update Driver button.
- If the Update Driver dialog box is not displayed, click the Browse my computer for driver software button on the Driver Details tab.
- In the Search for updates box, type the driver name, and then click the Search button.
- If the driver is found, click the Update button.
- If the driver is not found, click the Search button again.
- On the Update Driver Software dialog box, click the Update button.
- If the driver is not found, click the Install from a list of available drivers button.
- On the Driver Installation Options dialog box, click the Browse for driver software from a local or network location button.
- In the Search for driver software from a local or network location dialog box, type the driver name, and then click the Search button.
- If the driver is found, click the Update button.
- If the driver is not found, click the Install from a list of available drivers button.
- On the Driver Installation Options dialog box, click the Install from a local or network location button.
- In the Search for driver software from a local or network location dialog box, type the driver name, and then click the Search button.
- If the driver is found, click the Update button.
- If the driver is not found, click the Search button again.
- On the Update Driver Software dialog box, click the Update button.
2. Roll back the driver
There are a few steps to follow in order to Roll back a driver in a Windows environment:
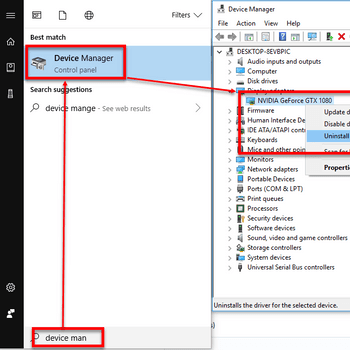
- Open Device Manager by clicking the Start button, typing "device manager" in the Start Search box, and pressing Enter.
- Under the Hardware tab, identify the device that is causing the problem and right-click on it.
- Select the Update Driver option from the menu that appears.
- Browse to the driver file that you wish toRoll back and click on the Next button.
- Select the appropriate installation type from the list that appears and click on the Next button.
- Review the information that is displayed and click on the Finish button.
- Restart the computer if prompted to do so.
3. Uninstall the driver
- Open the Device Manager by clicking on the Start button, typing devmgmt.msc and pressing Enter.
- Expand the category "Sound, video and game controllers" and select the device or devices that are causing the problem.
- Right-click on the device or devices and select "Uninstall."
- Follow the on-screen instructions to uninstall the driver.
- Reboot the computer to reinstall the driver.
If you didn't find success with an option above, then try:
- Reinstall the driver
- Disable the driver
- Enable the driver
- Scan for hardware changes


